Design your planning system
Most of us don't find our favourite planner or perfect system on the first try. However, constantly hopping from planner to planner gets expensive (and frustrating).
To find the planning system that supports your life, you need to:
- Be intentional: really stop and think through what you need and why you need it.
- Experiment: find a cheap, easy way to try out layouts and systems.
That's what this post is all about: a guide to help you discover your planning system. You'll try out a series of methods and layouts, starting with the most basic: a todo list. As you go, you'll reflect on your experience, and by the end you'll be closer to understanding what you need from your planning system right now.
Week 1: Introduction
How to use the guide: first timers
Obviously you can choose how to use this guide, go at any pace you like, skip ahead, and so on. But please keep in mind that it was designed to be worked through in order. Especially if you're fairly new to planning, or really stuck deciding what you need, I strongly recommend working through the whole thing.
Aim to give each section in the guide a week to test (unless it's really not working). This allows you to try it on a variety of days. Something which is great for work might not be so good for the weekends, or vice versa.
Test on normal weeks, not on vacation or other unusual times.
How to use the guide: revisits
As our lives change, our planning needs change. Coming back and going through this guide again (perhaps at an accelerated pace, or skipping parts), can be helpful whenever you feel your system isn't working for you.
You can also revert to trying out layouts when being tempted to make a switch. That exciting new format caught your eye? Test it out before buying.
Equipment
Don't go buying special supplies! If you're on this site, you almost certainly have everything you need already.
To work through this guide, you'll need:
- A notebook: ideally it should be cheap, or at least not super-special. You need to feel free to wreck it. Try to find a medium-sized one (maybe an A5 or 7x9) as this allows flexibility to try out other sizes (an A5 easily becomes an A6 or A4, for example). If you have the option, dotgrid or graph will make it easier to draw layouts.
- A pen: not a pencil. And lock away the whiteout while you're at it. Especially if you have a perfectionist side, you're going to be tempted to try and get your layouts perfect. Let it go. It's time to make a mess.
- A ruler (optional, but helpful)
Quickstart
Ok, so you really don't want to spend weeks on end trying things out? Or this is not your first time doing this? Here are the basic principles. Dive in and have fun.
- Start with a list: everything you need to include in your personal planning system, where it comes from, and where it currently lives. For example, you might note 'appointments -> come from everywhere! -> currently logged in weekly planner'.
- Consider the other things you want from this system: a journal? A record to look back to? A clearer idea of what you're doing each day? What does this system need to give you?
- Get a cheap notebook and start testing layouts and contents. Go with your instincts to start with, but be radical about cutting things. When you're looking at your habit tracker, how does it make you feel? When you write your todo list, how much of it actually matters? At the same time, be open to adding things. Perhaps you find it easier to do things you've written down, so creating space to record, say, meditation, makes you more likely to do it.
- Once you have a feel for what you actually need to track each month/week/day, think about tooling. Do you prefer digital or paper, or a mix? If you need to share your schedule, digital may make this easier. If you're using it more as a journal, paper might be helpful. There is a bewildering selection of tools out there: defining your needs first should make this step a lot easier.
- Pay attention to how your emerging system and tooling makes you feel, as well as its functionality. Ideally, there should be some joy in it.
Week 1: Your planning wishlist
Before you dive in to testing layouts and systems, you need a clear picture of your current situation.
Start with a list
Time to make use of that notebook!
Write a list of everything you want to include in your personal planning system.
For example, the first time I did this, it included:
- Appointments
- Habits
- Work
- Goals
- Personal projects
- Journaling
- Todos
Make a note of where these things come from, and where they currently live. For example:
- Appointments - come from everywhere! - Google Calendar
- Habits - come from my goals - tracker notepad
- Work - set by me and my manager - the company tasks system and my own notes
- Todos - emerge as I think of them - my memo pad
Week 2: Todos
This week is all about getting back to basics.
Weekly todos
On a fresh page, write out your todo list (or lists) for the week. This should include both appointments and general tasks, as well as anything else you want to track weekly (Grocery lists? Meal planning? Habits?). Refer back to your Wishlist.
Don't try to make it pretty, or worry how much space you're taking up. Write at your normal size and spacing.
Now take a look at it. Ask yourself:
- What categories are you seeing?
- How do you feel looking at it?
- How much of it actually matters?
If you can spot some obvious categories, try re-drawing your week with logical sections. For example, you could divide a page into appointments, work todos, and housework lists.
Too much to do?
If you're in an A5 or 7x9 notebook, and your weekly lists won't fit on a two page spread, it may be a sign you're adding too much. Be honest with yourself: how much of this will you really do? How much of it really matters?
Daily todos
Continue through the next few pages of the notebook, using a page per day. Write down any todos for the day. This should include appointments, todos that must happen on a particular day, and things you want to schedule for that day.
Now live with it for a week . . .
Now use this setup for the week. As you go through the week:
- Tick off todos.
- Note any extra tasks that get added.
- And note anything that gets cancelled or rescheduled.
- Keep note of how you feel. How are you reacting to your lists?
- Which lists are you actually looking at regularly?
At the end of the week
Ask yourself:
- What worked?
- What didn't?
- How did it make you feel?
Make a note of:
- Things you listed, but didn't get done
- Things that got added as the week went on
How close to reality was your plan?
At this point, you may already see some key points emerging. For example, if you wrote out all your work todos, but then barely looked at them (perhaps because you have no choice but to use a digital work system), ask yourself if you really want to include work todos in your planning system.
A personal note
This might be all you need. The first time I ever tried to design my own system, I very quickly realised that all I needed was a daily todos and appointments list. It was a time in my life where I had no routine, each day was different, and I had a lot of flexibility. The best system for me right then was a notebook, using a page per day, and barely planning anything until the night before.
You don't have to have an elaborate system. If a daily todo list is enough for you, that's fabulous!
Week 3: Logging
Hopefully, your experience last week with Todos was informative. I'm betting that you found two things:
- Lots of stuff on your lists didn't get done
- And lots of stuff got added
This week, you're going to flip planning on its head. Instead of a plan, you're going to keep a log.
In your notebook, set out a day per page.
Don't make any plans apart from things you absolutely must do. These are things like fixed appointments, deadlines, or chores that must be done. Be radical. For example, only include chores that absolutely must happen for the sake of hygiene. You probably have to take the trash out. But is dusting essential? Don't set up a habit tracker, don't set goals, and keep things like meal planning to the absolute minimum possible for you and your family to function.
At the start of the week, you should have a lot of blank space.
As the week goes on, make a note of what you do. These notes can be brief, but should include everything. For example:
Monday
7am - up, quick workout, shower, breakfast
8am - got kids up and out the door onto school bus
8:30am - commute
9am - checking messages
11am - meeting (erm, how did it take me 2hrs to check messages???)
Midday - lunch
1pm - another meeting
2pm - worked on project A
5pm - time to head home
6pm - dinner
Evening - did laundry, got kids into bed, crashed out in front of TV
Tuesday
7am
8am
8:30am - oh bollocks. Rushing kids to school.
9:30am - late for work . . .
And so on. Be honest.
At the end of the week
Look back on your week. Summarise what you actually did, and make a note of when you did it.
The point of this isn't to beat yourself up. As you see where your time goes, you should become kinder to yourself, and more realistic about what you can do.
Ask yourself:
- Where did you miss having a plan, or list?
- What types of list or plan would have been useful?
- What types of planning didn't you miss? Again, be honest. If skipping the habit tracking secretly feels like a relief, it's probably time to let the habit tracking go. Remember that your planning should support you.
Logging for its own sake
Take a moment to reflect: did you find it useful to keep track of what you did? This will vary widely between people. For example, I realised that it was really helpful for me to note what I do every hour of my working day (and have added that to the things my planning needs to support). But I don't want to be keeping track so carefully at weekends.
Reflect on how you feel about the logging itself. Decide if this is something you want to include in your planning.
Why didn't we do this first?
You may be wondering why I didn't ask you to do this exercise in the first week. I believe it has more impact if it follows a week where you planned everything, and had "perfect" todo lists.
A clearer idea of what you need
Go back to the list you wrote before you started, of all the things you want in your planning system. How many of them do you still feel you need? Is there anything you want to add?
You should now have a better idea of what's essential in your planning system, and what's optional, or even unhelpful. Which means it's time to test layouts!
Weeks 4-6: Layouts!
Each week, try a different layout. Draw each layout in your notebook. I recommend:
- Spend one week on a daily layout. Keep this one simple: times down one side, todo list or notes space down the other.
-
And then spend two weeks on weekly layouts:
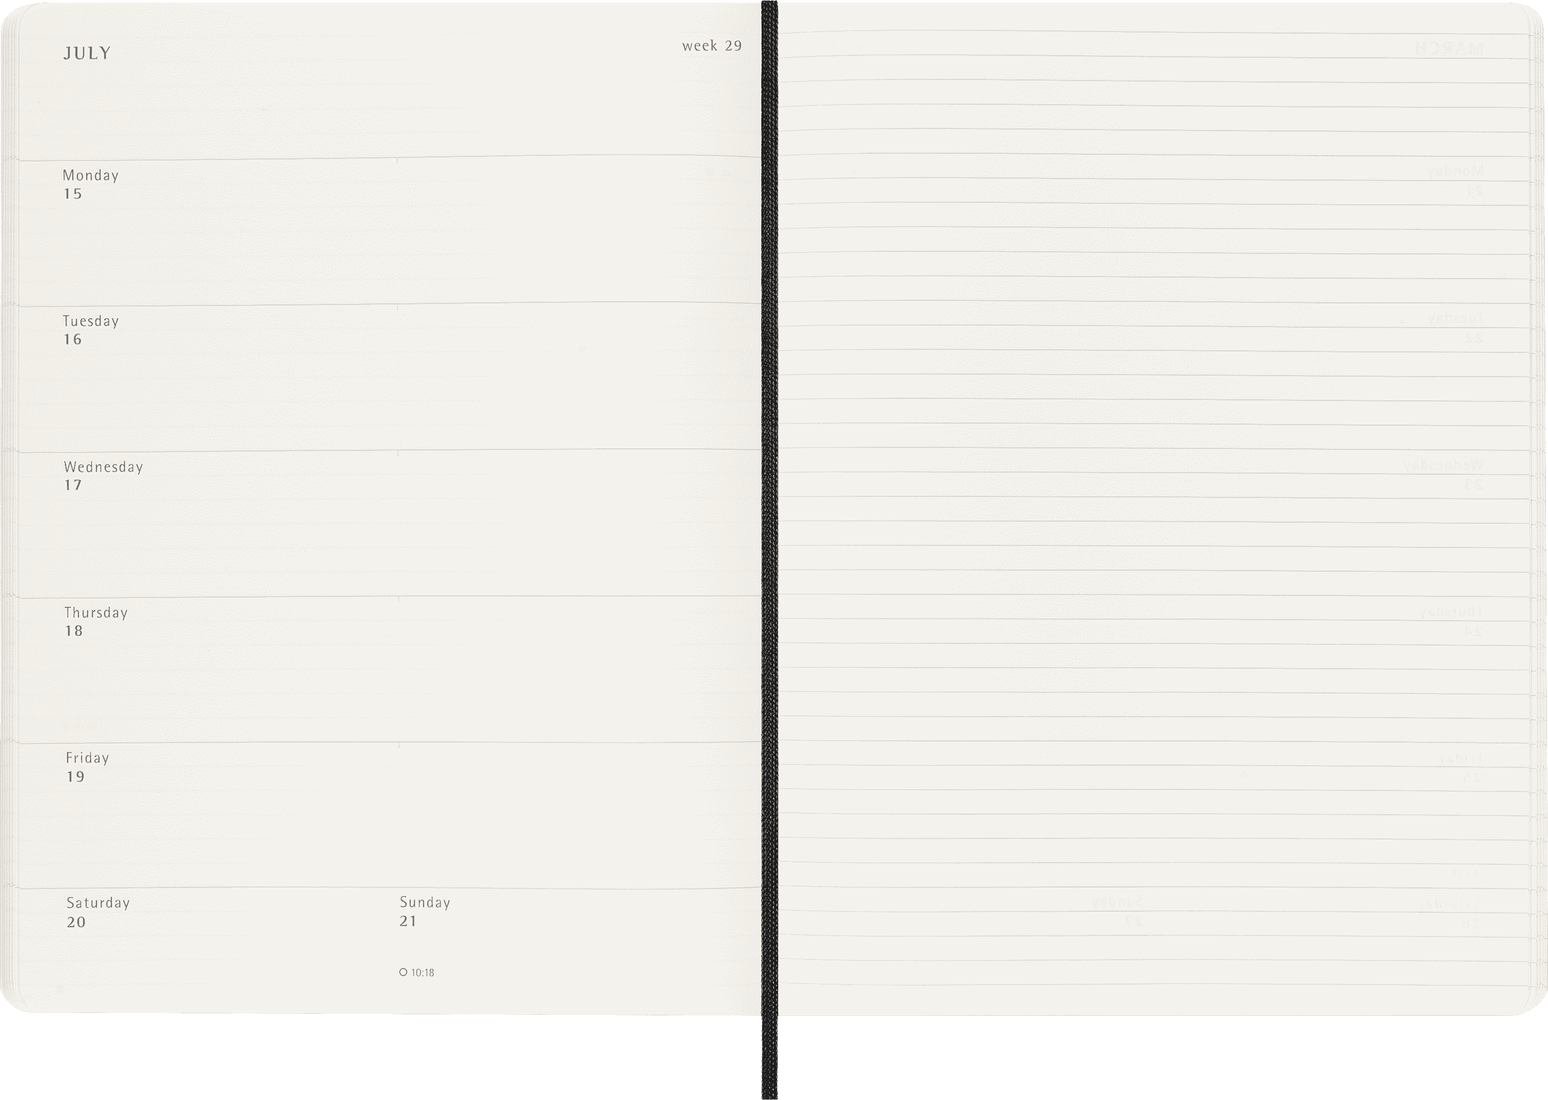
One should be a days + notes, similar to Moleskine or Leuchtturm. The image shows Moleskine. 
And the other should use the full weekly space for days. You can use a traditional horizontal or a quad layout for this. The image shows Plum Paper's Quad layout.
Three weeks is the minimum for this. If you have other layouts you want to try, this is the time to do it.
At the end of each week
Ask yourself:
- What worked?
- What didn't?
- How did it make you feel?
Start testing products
You should now have a fairly clear idea what you need from your planner, and roughly what layouts you prefer. You've probably been watching planner reviews and browsing shops while going through this process, but if not, now's the time to start window shopping.
Once you have specific planners in mind, try to test them out before purchase. There are a few ways to do this:
- Some companies offer downloads you can print to try out layouts, or sample booklets you can buy.
- For simple layouts, you can try drawing it out. I have to admit the idea of drawing a full hourly weekly for several weeks is more than I'd want to do, but for something like a simple horizontal it should be possible to draw your own.
- Buy second hand or in a sale: this allows you to try the product itself. While it's the most expensive option, it does have the advantage of allowing you to test out things like the paper, binding, and so on. If you choose this option, you also get to live with the planner for a while, which can help you be really confident it's right for you.
And finally: buy your planner
Congratulations! You're ready to buy your planner. Hopefully, working through this guide first will mean the planner you end up with is the right one for you!